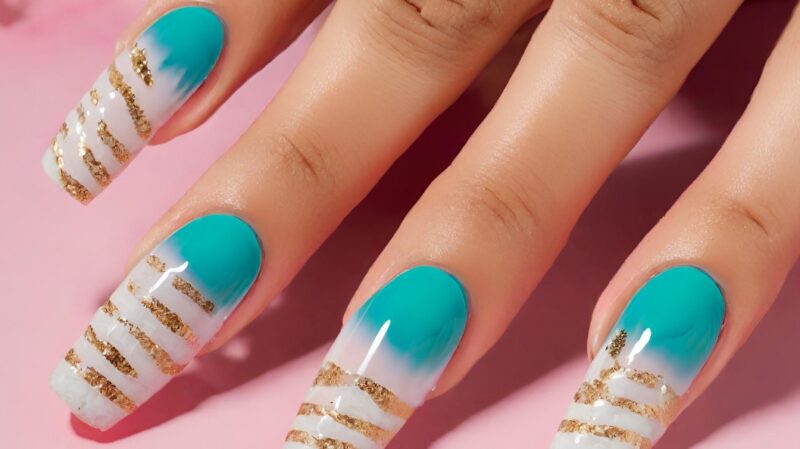
If you’re looking to create stunning acrylic nails in the comfort of your home, you’re in the right place. I’ve been doing my own acrylic nails for years and I’m excited to share my knowledge and tips with you.
Getting them done at a salon can be pricey and time-consuming which is why I’ll take you through each step of the process, ensuring that even beginners can achieve professional-looking results.
Getting Started: Tools and Materials
- Acrylic Nail Tips and Nail Glue: Choose tips that match the width of your natural nails. Ensure that the tips are not too wide or narrow to avoid an unnatural look. Look for high-quality glue to ensure a strong bond without damaging your natural nails.
- Acrylic Powder and Liquid: These are mixed to create the acrylic that will be applied to your nails. The ratio of powder to liquid is key for the perfect consistency. Experiment with different brands to find the one that works best for you.
- Nail Dehydrator and Primer: These prepare your nails for acrylic application. The dehydrator removes moisture for better adhesion. The primer acts as a base to enhance the longevity of the acrylic nails.
- Nail File and Buffer: For shaping and smoothing the nails. Use the file to shape the tips to your desired style. The buffer smooths the nail surface for a flawless finish.
- Acrylic Brush: A quality brush is essential for smooth application. Choose a brush size that is comfortable for your hand. Keep the brush clean and properly shaped for the best results.
- Cuticle Pusher and Clippers: For preparing your natural nails. Gently push back the cuticles for a clean nail bed. Use the clippers to trim any excess skin carefully.
- Nail Forms (optional): If you prefer sculpting over tips. Nail forms help in creating a desired nail shape and length. They are great for custom designs and longer nail extensions.
What to Do?
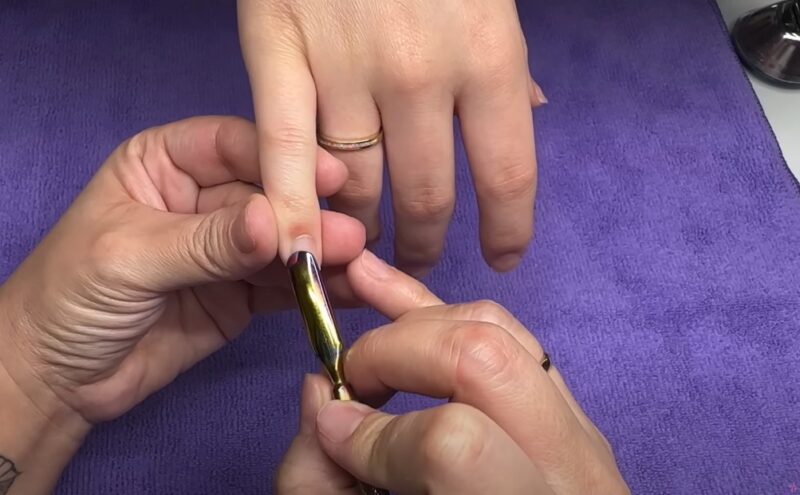
Step 1: Prep Your Natural Nails
Start by cleaning your hands and nails thoroughly with soap and water. Next, sanitize your hands and nails with a gentle nail cleanser or rubbing alcohol to remove any oil or residue. Push back your cuticles carefully using a cuticle pusher and trim any excess with a cuticle nipper.
Then, use the nail file to gently buff the surface of your nails to remove shine, which helps in adhesion. This creates a rough texture for better adhesion of the artificial nails. Finally, apply a nail dehydrator to remove moisture and follow up with a nail primer to ensure a strong bond with the nail enhancements.
Step 2: Applying the Tips
Select a nail tip that fits each nail perfectly, ensuring it covers the nail from side to side without overlapping the skin. If necessary, gently file the edges of the tip for a perfect fit. Apply a small amount of glue to the tip, focusing on the area that will attach to your natural nail.
Press it onto your natural nail, holding it for a few seconds to ensure a strong bond. Once all the tips are on, use the clippers to trim them to your desired length. Shape them with the file into a square, oval, or any preferred shape, ensuring they are even and symmetrical.
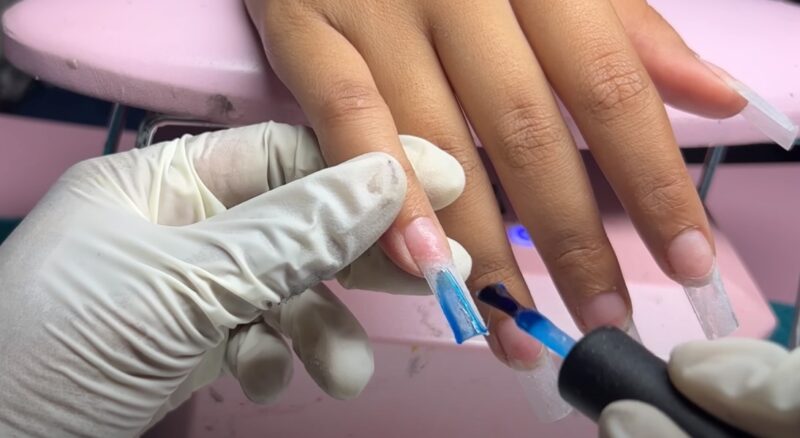
Step 3: Mixing and Applying the Acrylic
Pour some acrylic liquid into a small dish, ensuring it’s enough for the number of nails you’re doing but not so much that it evaporates quickly. Dip your brush into it, wiping off the excess liquid to avoid a runny bead. Tap the brush gently against the side of the dish to control the liquid amount.
Then, dip the brush into the acrylic powder to form a small, medium-wet bead of acrylic. Apply this bead to the seam between the nail tip and your natural nail, using the brush to pat and spread it evenly. Work quickly but carefully, ensuring no bubbles form in the acrylic.
Cover the entire nail with a thin, even layer of acrylic, paying attention to the sidewalls and cuticle area for a seamless look. Let it dry for a few minutes, checking for a solid, non-tacky texture.
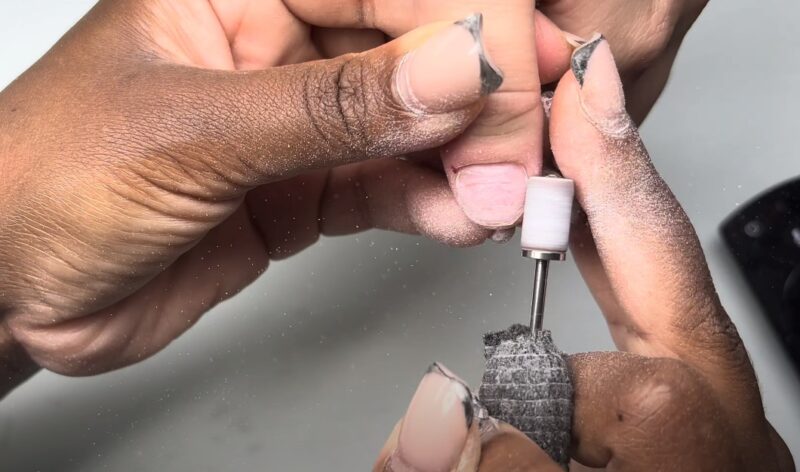
Step 4: Shaping and Buffing
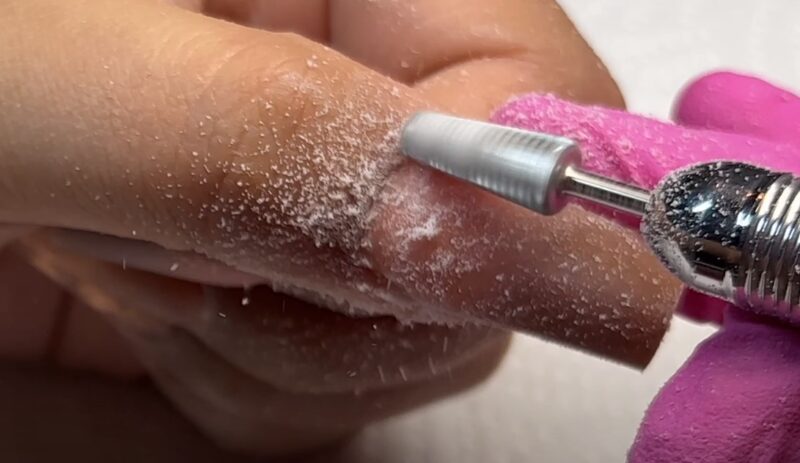
Once the acrylic has hardened, start shaping the nails with your file. Focus on the sidewalls and tip to achieve a uniform shape on all nails. Smooth the surface with the buffer, using light, even strokes to avoid creating dips in the acrylic.
This step is crucial for a natural and professional look, as it removes any lumps or uneven areas. Dust off the filings and inspect each nail for any imperfections that might need more filing or buffing.
Step 5: Finishing Touches
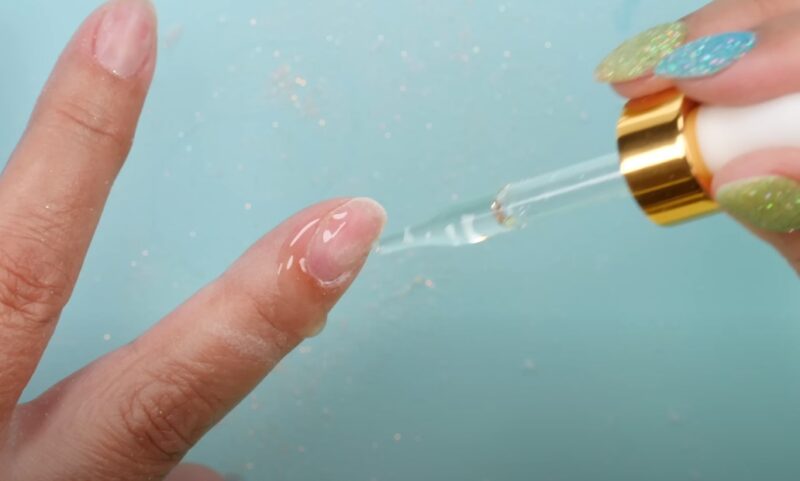
Wash your hands with mild soap and water to remove any dust and filings from the acrylic application. Dry your hands and nails thoroughly before proceeding to the next step. You can now apply nail polish in your chosen color or design, starting with a base coat to protect the acrylic.
If you prefer a natural look, simply buff the nails to a high shine. Finish with a top coat for extra shine and protection, ensuring you seal the edges of the nails to prevent chipping. Allow the nails to dry completely before using your hands for any strenuous activities.
Tips for Success
Practice!
Acrylic application can be tricky. Practice makes perfect! Start with simple designs to build your skills. Watch tutorials and learn from professionals. Experiment with different brushes and techniques for a better understanding.
Ensure Good Ventilation
Work in a well-ventilated area as acrylic can be strong-smelling. Open windows or use a fan to circulate air. Avoid working in closed, small rooms. If possible, use an air purifier to reduce fumes.
Choose Quality Products
Invest in good-quality materials for the best results. High-grade acrylics give brighter colors and smoother application. Don’t skimp on brushes and tools; they make a significant difference. Remember, quality products last longer and provide value over time.
Be Patient!
Take your time with each step for a professional finish. Rushing can lead to mistakes and uneven application. Allow layers to dry completely before adding more. Focus on precision, especially around edges and intricate designs.
FAQs
How long do acrylic nails last when done at home?
With proper application and care, homemade acrylic nails can last between 2 to 3 weeks. The longevity also depends on how well you prepare your natural nails and the quality of the products used.
What should I do if an acrylic nail lifts or breaks?
If an acrylic nail lifts or breaks, you can repair it at home. Gently file down the lifted area and reapply a small amount of acrylic mixture. For a break, remove the broken part, apply a new tip, and reapply acrylic.
Is it safe to remove acrylic nails at home, and how can I do it?
Yes, it’s safe to remove acrylic nails at home. Soak your nails in 100% acetone for about 10-15 minutes until the acrylic softens. Then, gently remove the softened acrylic with a cuticle pusher.
Can I apply acrylic nails over a damaged nail or cuticle?
It’s not recommended to apply acrylics over damaged nails or cuticles as it can lead to further damage or infection. Allow any nail or cuticle damage to heal completely before applying acrylics.
How do I maintain the health of my natural nails while frequently doing acrylics?
To maintain healthy natural nails, ensure that you properly prep your nails before application and avoid over-filing. Regularly moisturize your cuticles and take breaks between acrylic applications to allow your nails to recover.
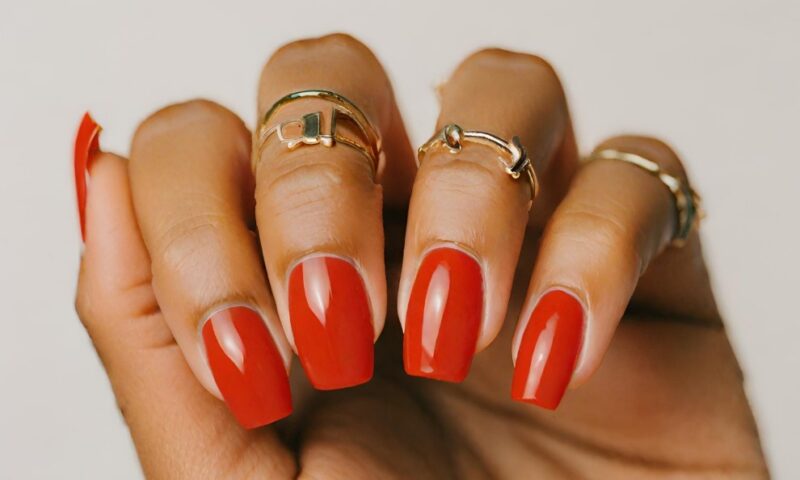
The Bottom Line
Doing acrylic nails at home can be a really fun experience. With the right tools, patience, and practice, you can achieve beautiful, salon-quality nails from the comfort of your home. Trust the process!